How to Deploy Postgres on Kubernetes with S3 Backups
In this tutorial we will be deploying PostgreSQL into a Kubernetes cluster using CloudNativePG and enabling continuous backups to Amazon S3.
- Prerequisites
- Install CloudNativePG
- Provide Access to Amazon S3
- Configure and Deploy a Database Cluster
- Accessing the Database
- Finishing Up
- Additional Resources
Prerequisites
- A running Kubernetes cluster
- This can either be on your local machine or from a cloud provider. If you have Docker Desktop installed, you can enable Kubernetes within the dashboard to setup a single node cluster.
kubectlcommand line tool- This is how we will communicate with our Kubernetes cluster. If you have Docker Desktop installed, this tool comes bundled with it and you should be all set.
helmcommand line tool
Install CloudNativePG
CloudNativePG is a Kubernetes operator that fully manages the lifecycle of a PostgreSQL database cluster, with primary/standby configuration, automatic failover, scheduled backups, and much more.
We will be using Helm to install this operator on our cluster. See here if you have not set this up yet.
First we want to add the helm repo where the cloudnative-pg chart is hosted:
helm repo add cnpg https://cloudnative-pg.github.io/charts --force-update
helm repo update
Next we want to search for the cloudnative-pg package to identify the latest version:
helm search repo cloudnative-pg
This should produce an output similar to this:
NAME                 CHART VERSION  APP VERSION  DESCRIPTION
cnpg/cloudnative-pg  0.20.2         1.22.2       CloudNativePG Helm Chart
The package name and the chart version is what we are looking for, in this case it is cnpg/cloudnative-pg and 0.20.2.
Using these values run the following command to install the cnpg/cloudnative-pg package into your cluster:
helm install cnpg \
  cnpg/cloudnative-pg \
  --namespace cnpg-system \
  --create-namespace \
  --version 0.20.2
This tells helm to install chart version 0.20.2 of the cnpg/cloudnative-pg package within the cnpg-system namespace. The first cnpg param is the name of the “release” which allows us to reference this installation as a whole.
The command might take a few seconds to complete, but if successful you should see something similar to this:
NAME: cnpg
LAST DEPLOYED: Tue Mar 19 09:06:43 2024
NAMESPACE: cnpg-system
STATUS: deployed
REVISION: 1
TEST SUITE: None
NOTES:
CloudNativePG operator should be installed in namespace "cnpg-system".
Provide Access to Amazon S3
Next we need to setup access to Amazon S3 where we plan to store our database backups.
Create a S3 Bucket
From the AWS console navigate to the S3 service and click “Create bucket”.
Select the AWS region closest to your Kubernetes cluster and provide a name for your bucket (e.g. “yourdomain-db-backups”), you shouldn’t need to change any of the other defaults.
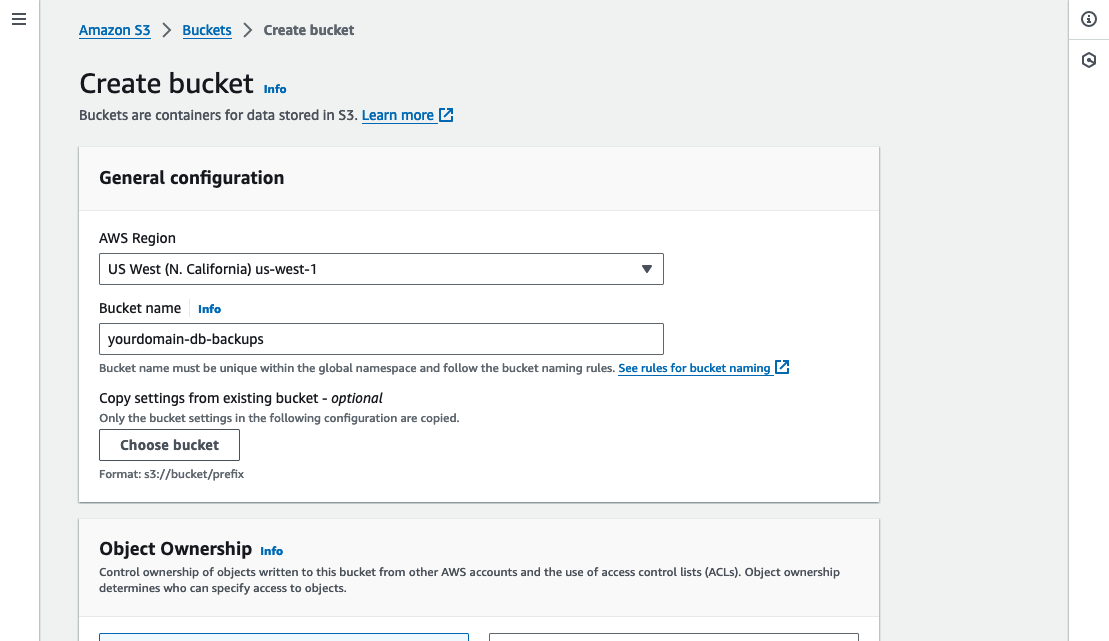
Click “Create bucket”.
Create an Access Policy
Next we want to create a permission policy that grants access to the bucket we just created.
From within the AWS console navigate to the IAM service and click “Policies”.
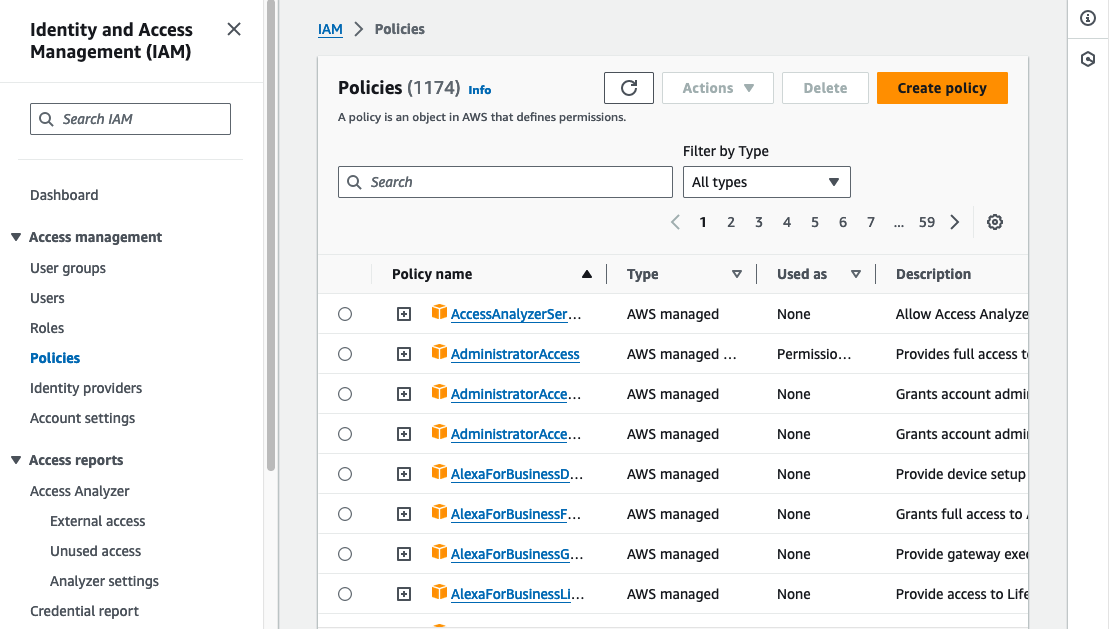
Click “Create policy” and then select “JSON” from the Policy editor toggle and paste in the following:
{
  "Version": "2012-10-17",
  "Statement": [
    {
      "Effect": "Allow",
      "Action": "s3:*",
      "Resource": [
        "arn:aws:s3:::yourdomain-db-backups",
        "arn:aws:s3:::yourdomain-db-backups/*"
      ]
    }
  ]
}
Replace yourdomain-db-backups with your bucket name.
This policy grants permission to perform all S3 actions (s3:*) on both the bucket and on all objects within the bucket specified.
Click “Next”.
For the policy name enter something meaningful (e.g. “S3Access_yourdomain-db-backups”) and then click “Create Policy”.
Create an IAM User
Now that we have our policy setup we want to create a new user to assign the policy to.
From within the AWS console navigate to the IAM service and click on “Users”.
Click “Create user” and then enter a name for your user (e.g. “yourdomain-db-user”).

Leave the “Provide user access to the AWS Management Console” checkbox unchecked and click “Next”.
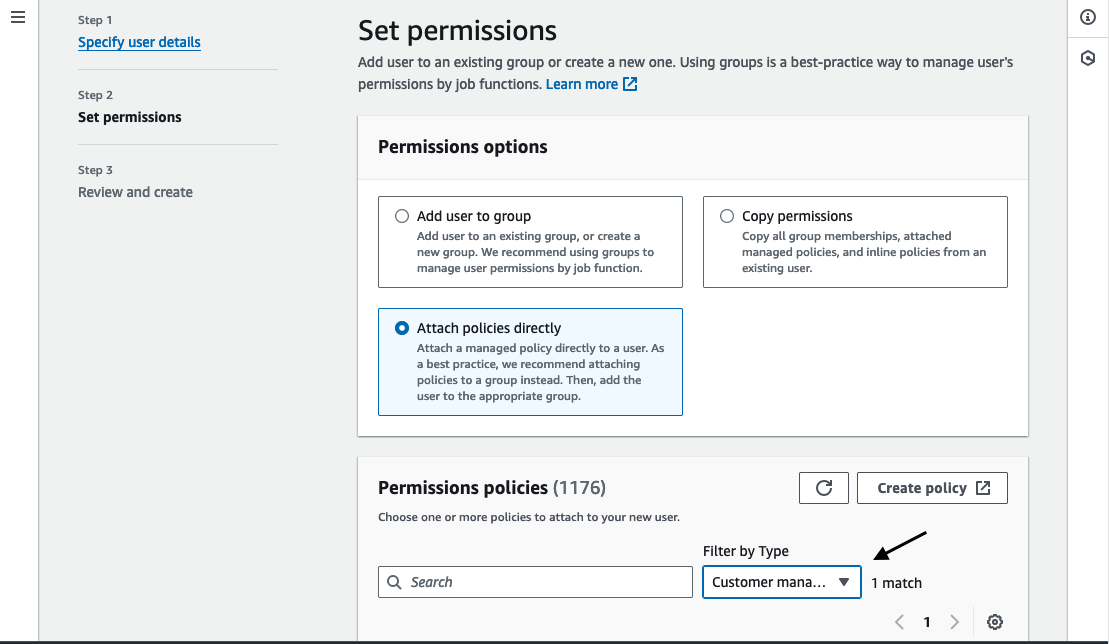
When prompted to select permissions, choose “Attach policies directly”.
Update the permissions policies filter type to be “Customer managed” and select the policy we created in the previous step. Click “Next”.
Review the details of the new user and if everything looks good click “Create user”.
Create an Access Key
Now that we have our user setup, we need to create an access key that we can provide to the CloudNativePG service.
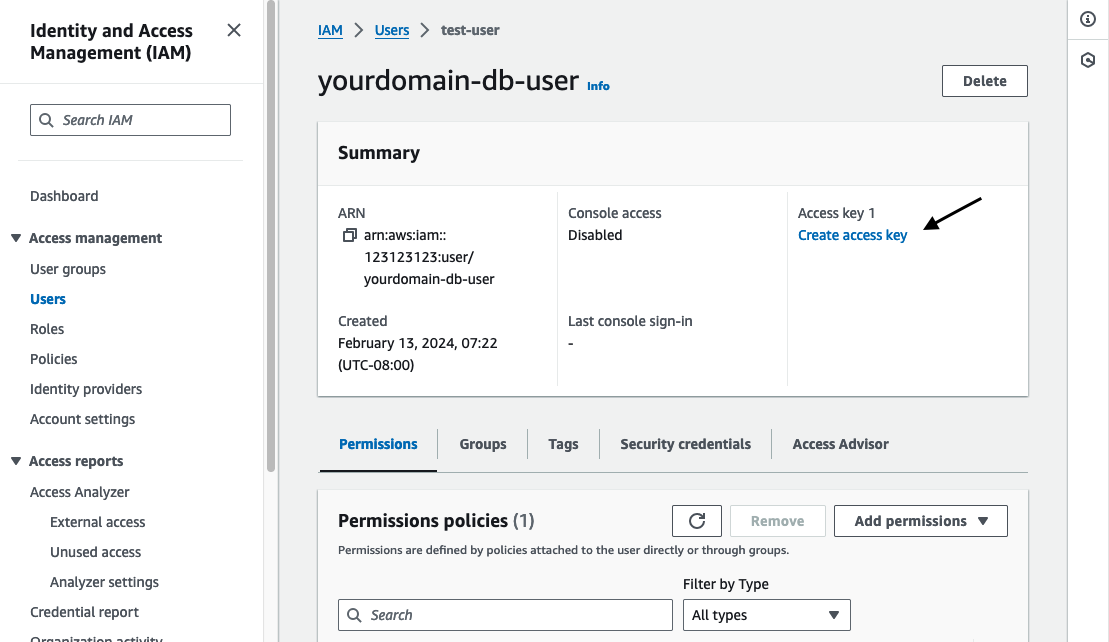
From the AWS console navigate to the IAM service and click on “Users”.
Click on the user we just created and then in the header click “Create access key”.
If prompted for a use case, select “Other” and click “Next”.
When prompted for a description enter “CloudNativePG” and then click “Create access key”.
Copy or download the file containing the access key and secret.
Create a Kubernetes Secret
Now that we have our S3 credentials we need to create a Kubernetes secret to store them.
Using the access key and secret from the previous step, create a new secret within your Kubernetes cluster with the following command:
kubectl create secret generic s3-creds \
  --from-literal=ACCESS_KEY_ID=<access key here> \
  --from-literal=SECRET_ACCESS_KEY=<secret key here>
Replace <access key here> and <secret key here> with your S3 credentials.
This command creates a new secret of the generic type with a name of s3-creds that we can reference when we are configuring our database cluster.
Run the command with the updated values, you should see the following output:
secret/s3-creds created
Note: This command will be saved in your shell history with the credentials plain to see. If this is a problem you can manually edit your history file to remove it.
Configure and Deploy a Database Cluster
Now that we have our S3 access credentials we can move on to configuring and deploying our database cluster.
Configure
Create a new yourdomain-db.yml file with the following contents:
# yourdomain-db.yml
---
apiVersion: postgresql.cnpg.io/v1
kind: Cluster
metadata:
  name: yourdomain-db
spec:
  instances: 3
  imageName: ghcr.io/cloudnative-pg/postgresql:16.2
  storage:
    size: 10Gi
  backup:
    retentionPolicy: 30d
    barmanObjectStore:
      destinationPath: s3://yourdomain-db-backups
      s3Credentials:
        accessKeyId:
          name: s3-creds
          key: ACCESS_KEY_ID
        secretAccessKey:
          name: s3-creds
          key: SECRET_ACCESS_KEY
---
apiVersion: postgresql.cnpg.io/v1
kind: ScheduledBackup
metadata:
  name: yourdomain-db-backup
spec:
  schedule: "0 0 0 * * *"
  immediate: true
  backupOwnerReference: self
  cluster:
    name: yourdomain-db
Let’s take a look at the key fields to understand what is going on.
First we name the database Cluster based on our website name:
kind: Cluster
metadata:
  name: yourdomain-db
Next we specify how many instances we want running in our cluster:
spec:
  instances: 3
This will create 3 instances of our database, 1 primary and 2 read-only replicas. You should have at least 2 instances to ensure high availability and to support automatic failover.
Next we specify the PostgreSQL image to use in our cluster:
imageName: ghcr.io/cloudnative-pg/postgresql:16.2
Because we are enabling backups, we need to use an image of PostgreSQL that has the barman-cli-cloud (Backup and Recovery Manager) package installed. CloudNativePG provides up to date PostgreSQL images for this purpose in their container registry.
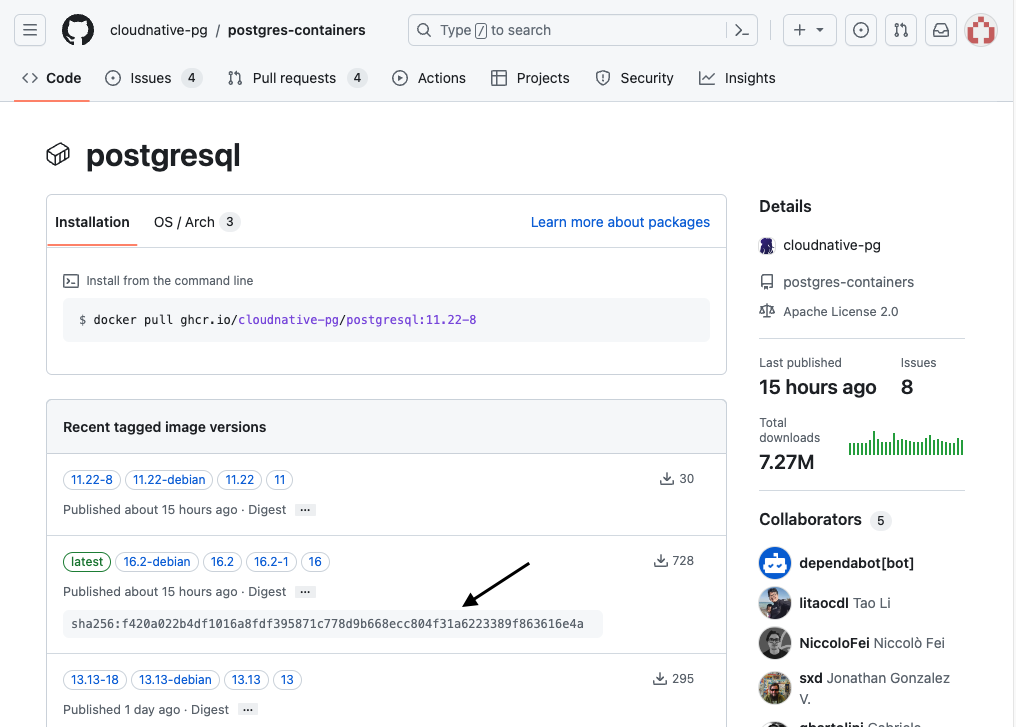
In our example we are using the 16.2 tag of the cloudnative-pg/postgresql image from the ghcr.io container registry. If this was for production it is recommended to also include the digest when specifying the imageName to ensure consistency:
imageName: ghcr.io/cloudnative-pg/postgresql:16.2@sha256:f420a022b4df1016a8fdf395871c778d9b668ecc804f31a6223389f863616e4a
You can find the digest value in the container registry:
Next we configure how much storage we want to allocate for each instance:
storage:
  size: 10Gi
The size here can be expanded but it cannot be decreased.
Next we configure our backup service:
backup:
  retentionPolicy: 30d
  barmanObjectStore:
    destinationPath: s3://yourdomain-db-backups
    s3Credentials:
      accessKeyId:
        name: s3-creds
        key: ACCESS_KEY_ID
      secretAccessKey:
        name: s3-creds
        key: SECRET_ACCESS_KEY
The backup section of our config defines how backups on the cluster will be processed. In our case we are backing up to an object store (Amazon S3), so we provide configuration using the barmanObjectStore key.
Providing this section will also enable continuous Write-Ahead Log (WAL) archiving, which gives us the ability to recover from any point in time within the retention window, which in our case is 30 days (30d).
The desinationPath is the S3 bucket where we want to store the backups, replace yourdomain-db-backups with the name of your bucket. You can use additional folders in the path if needed.
The s3Credentials section defines the AWS credentials to use when interfacing with S3. The name and key values here are references to the Kubernetes secret we created in the previous section, with s3-creds being the name of the secret and ACCESS_KEY_ID and SECRET_ACCESS_KEY being the key names we provided. If you followed the tutorial you should not need to change this section.
Next we configure our base backups:
---
apiVersion: postgresql.cnpg.io/v1
kind: ScheduledBackup
metadata:
  name: yourdomain-db-backup
spec:
  schedule: "0 0 0 * * *"
  immediate: true
  backupOwnerReference: self
  cluster:
    name: yourdomain-db
Along with the WAL archiving we also need to be storing physical base backups of our database, which are copies of all the files that PostgreSQL uses to store data. These are what will be used as a starting point when a restore is requested. The base backup is restored and then the WAL is applied up until the point in time requested to get you back to a good state.
In our configuration here we are scheduling a backup each night at 12am. The value provided to the schedule key is using a cron expression with values for seconds, minutes, hours, day of the month, month, day of the week.
The immediate: true configuration specifies that we want the first backup to trigger immediately.
Deploy
Now that we have our cluster configured, we can go ahead and apply this manifest file to deploy our cluster:
kubectl apply -f yourdomain-db.yml
The command should output the following:
cluster.postgresql.cnpg.io/yourdomain-db created
scheduledbackup.postgresql.cnpg.io/yourdomain-db-backup created
Verify
As the cluster is being deployed you can run the following command to check the status:
kubectl get cluster
This should output the name of the cluster you just created and the overall status:
NAME            AGE    INSTANCES   READY   STATUS                                       PRIMARY
yourdomain-db   2m8s   3           2       Waiting for the instances to become active   yourdomain-db-1
After a few minutes you should see:
NAME                    AGE     INSTANCES   READY   STATUS                     PRIMARY
yourdomain-db   4m54s   3           3       Cluster in healthy state   yourdomain-db-1
You can also use the describe command to ensure everything is configured as expected or to debug issues:
kubectl describe cluster yourdomain-db
The backups should be running at this point as well. Use the following commands to verify:
kubectl get scheduledbackup
kubectl get backup
Again you can use the kubectl describe command to see additional details for these resources.
If for some reason the backup is failing and the cause is not obvious from the kubectl describe command, you can usually find the problem in the postgres logs. Use the following command to tail the logs for all of the database instances:
kubectl logs -f -l cnpg.io/cluster=yourdomain-db
If everything is working as expected you should see 2 new folders in your s3 bucket, 1 for the initial base backup and another for the WAL archives:

Accessing the Database
Now that our cluster is up and running with continuous backups, we just need a way to connect to the database.
Database Host
When you create a database cluster, 3 services for accessing the database will also be created with the following naming convention:
[cluster name]-rw: Connects to the primary instance of the cluster[cluster name]-ro: Connects to the read-only instances of the cluster[cluster name]-r: Connects to any of the instances for read requests
You can view these services with the following command:
kubectl get services
Which should output some basic information for each of the services:
NAME               TYPE        CLUSTER-IP       EXTERNAL-IP   PORT(S)    AGE
yourdomain-db-r    ClusterIP   10.108.123.237   <none>        5432/TCP   6h41m
yourdomain-db-ro   ClusterIP   10.106.192.194   <none>        5432/TCP   6h41m
yourdomain-db-rw   ClusterIP   10.106.0.61      <none>        5432/TCP   6h41m
If your application is deployed to the same namespace as the database you can use these service names directly as the DB host name, otherwise you will need to use the full qualifier: <service name>.<namespace>.
Database Name
When the cluster is first initialized it will create a new database with the name app. This name is configurable but if you did not make any changes to the cluster config your database will be named app.
Database Credentials
The credentials to access the database are stored in a basic-auth Kubernetes secret that was also created when the cluster was first initialized.
The name of the secret is based off of the cluster name with -app appended. In our example the secret name would be yourdomain-db-app.
You can view the available secrets with the following command:
kubectl get secrets
Which will output a list of secrets in the default namespace:
NAME                        TYPE                       DATA   AGE
yourdomain-db-app           kubernetes.io/basic-auth   9      23h
yourdomain-db-ca            Opaque                     2      23h
yourdomain-db-replication   kubernetes.io/tls          2      23h
yourdomain-db-server        kubernetes.io/tls          2      23h
s3-creds                    Opaque                     2      24h
The -app secret is what we are looking for.
Use the kubectl describe command to view the keys available in the secret:
kubectl describe secret yourdomain-db-app
Which should output the following:
Name:         yourdomain-db-app
Namespace:    default
Labels:       cnpg.io/cluster=yourdomain-db-app
              cnpg.io/reload=true
Annotations:  cnpg.io/operatorVersion: 1.22.1

Type:  kubernetes.io/basic-auth

Data
====
dbname:    3 bytes
port:      4 bytes
uri:       118 bytes
user:      3 bytes
username:  3 bytes
host:      27 bytes
jdbc-uri:  137 bytes
password:  64 bytes
pgpass:    106 bytes
The username and password keys are what we are mainly interested in here, however the uri and jdbc-uri keys provide full connection strings to connect to the primary instance if this is all you need.
If you also wanted to configure access to the read-only replicas from your application you would need to use the username and password keys individually.
Example Application Access
To show how to use these credentials in your app we are going to deploy an instance of the Vikunja to-do app.
Create a file named vikunja.yml with the following:
# vikunja.yml
---
apiVersion: v1
kind: Pod
metadata:
  name: vikunja
spec:
  containers:
  - name: vikunja
    image: vikunja/vikunja
    ports:
    - containerPort: 3456
    env:
    - name: VIKUNJA_DATABASE_TYPE
      value: postgres
    - name: VIKUNJA_DATABASE_HOST
      value: yourdomain-db-rw
    - name: VIKUNJA_DATABASE_DATABASE
      value: app
    - name: VIKUNJA_DATABASE_USER
      valueFrom:
        secretKeyRef:
          name: yourdomain-db-app
          key: username
    - name: VIKUNJA_DATABASE_PASSWORD
      valueFrom:
        secretKeyRef:
          name: yourdomain-db-app
          key: password
In the env section we are setting the following environment variables to connect to our database:
VIKUNJA_DATABASE_TYPE- postgresVIKUNJA_DATABASE_HOST- The host is the read/write service name for our cluster “yourdomain-db-rw”VIKUNJA_DATABASE_DATABASE- The default database name for a cluster is “app”VIKUNJA_DATABASE_USER- The username we read from theusernamekey in our cluster app secretVIKUNJA_DATABASE_PASSWORD- The password we read from thepasswordkey in our cluster app secret
With the file updated replacing yourdomain-db with your cluster name, run the following command to deploy the pod:
kubectl apply -f vikunja.yml
And then setup port forwarding to be able to access this pod locally:
kubectl port-forward pods/vikunja 3456:3456
Once the pod is deployed (it may take a minute or 2) you should now be able to access Vikunja in your browser by visiting http://localhost:3456:
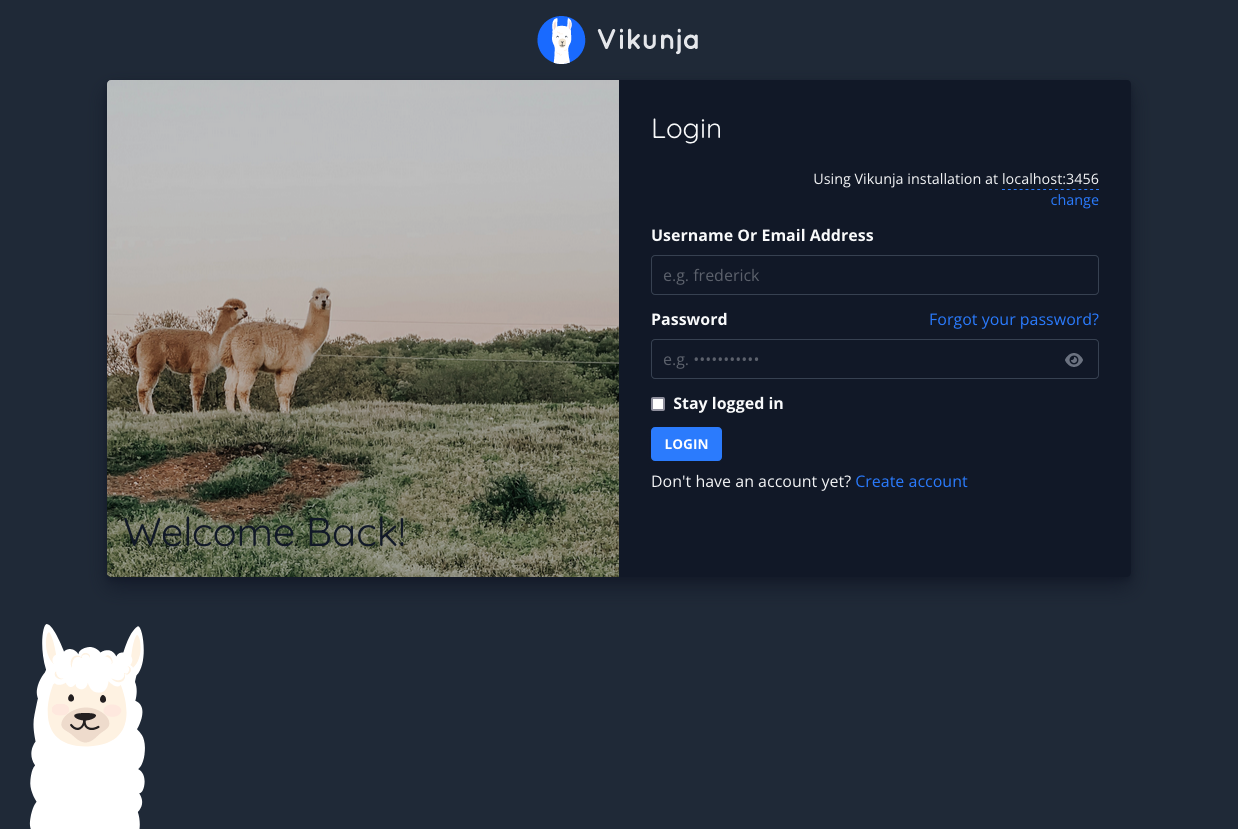
You can go ahead and signup and start creating tasks to test things out, but if the app loaded at all it means the database is connected properly.
After you are done testing run the following command to delete the test pod:
kubectl delete pod vikunja
Finishing Up
At this point our database cluster is fully setup and ready to use with continuous backups being saved to S3. A good next step would be to familiarize yourself with the recovery process.