Setting Up SolrCloud with Autoscaling
Zookeeper Setup
Zookeeper will be used to centralize the configuration across SolrCloud instances as well as manage synchronization/replication between nodes.
Download
https://www.apache.org/dyn/closer.cgi/zookeeper/
Unpack
tar -xvzf zookeeper-3.4.12.tar.gz
Config
Create a data directory where zookeeper will store data for the SolrCloud cluster:
mkdir /var/lib/zookeeper
Copy the Zookeeper sample config included in the package to conf/zoo.cfg:
cd zookeeper-3.4.12
cp conf/zoo_sample.cfg conf/zoo.cfg
Update the zoo.cfg file to use the data directory created above:
dataDir=/var/lib/zookeeper
Start
Use the script packaged with Zookeeper to start the service:
cd zookeeper-3.4.12
./bin/zkServer.sh start
This will start the Zookeeper service on port 2181 by default.
SolrCloud Setup
Download
https://lucene.apache.org/solr/mirrors-solr-latest-redir.html
Unpack
tar -xvzf solr-7.6.0.tgz
Start
Use the script packaged with Solr to start the service:
cd solr-7.6.0
./bin/solr start -c -z 127.0.0.1:2181
| -c | specifies that Solr be started in SolrCloud mode |
| -z | specifies where our Zookeeper instance is running |
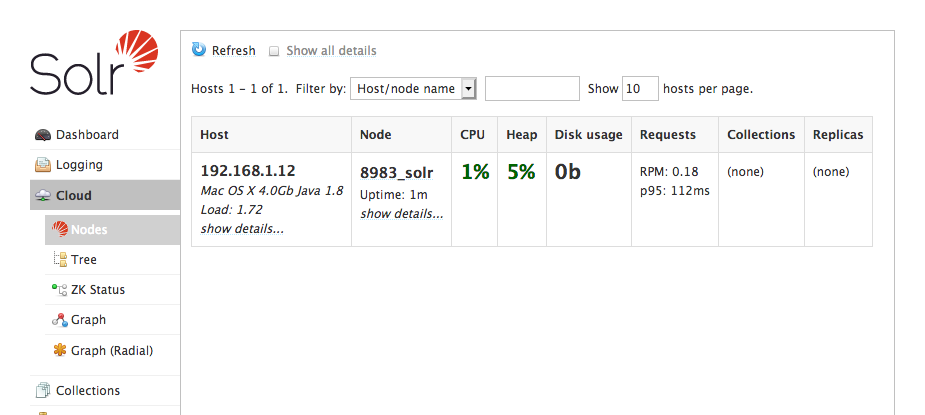
Verify
Open your browser to http://localhost:8983/solr and verify that Solr has been started in cloud mode:
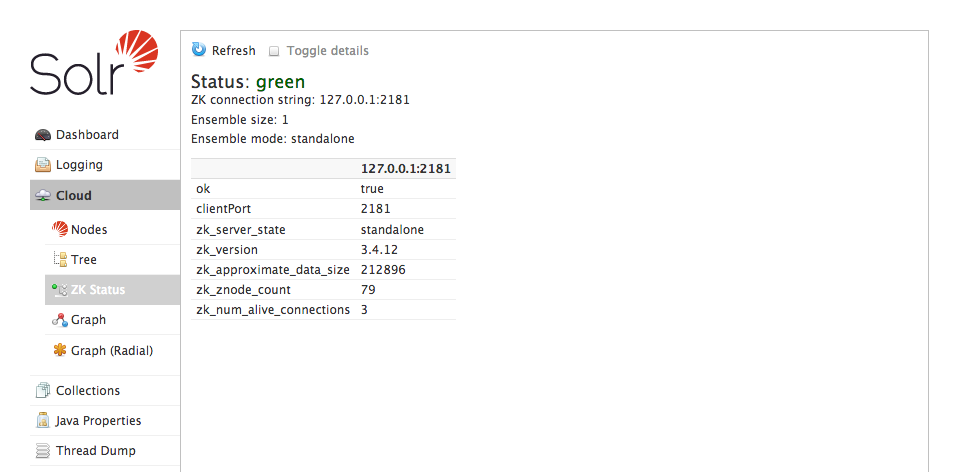
And that it is using the correct Zookeeper instance:
Create a Search Collection
Upload Config To ZooKeeper
Solr comes packaged with a default collection configuration that essentially works as “schemaless”, meaning that fields do not need to be explicitly defined and Solr will attempt to guess field types on import. This is the config we are going to use for this setup. Use the built-in Solr script to upload the config set to Zookeeper:
cd solr-7.6.0
./bin/solr zk upconfig -d server/solr/configsets/_default -n schemaless -z 127.0.0.1:2181
| -d | specifies the configset that we want to upload to Zookeeper |
| -n | specifies the name of the configset so we can reference it later |
| -z | specifies where our Zookeeper instance is running |
The solr.xml file containing global configuration settings will also need to be uploaded to Zookeeper so it can be shared between nodes:
cd solr-7.6.0
./bin/solr zk cp server/solr/solr.xml zk:/ -z 127.0.0.1:2181
This command is copying the solr.xml file from the local server/solr directory to the Zookeeper root (zk:/).
Create SolrCloud Collection
cd solr-7.6.0
./bin/solr create -c products -n schemaless -shards 1 -replicationFactor 2
| -c | specifies the name of the collection to create |
| -n | specifies the name of the config to use for this collection (we named it products) |
| -shards | specifies the number of shards to split the collection into (default 1) |
| -replicationFactor | specifies the number of copies of each document in the collection (default 1 - no replication) |
The above creates a new collection named “products” using the “schemaless” config we uploaded to Zookeeper. We kept the shards at the default 1 (no sharding) but we set the replicationFactor to 2, adding a level of redundancy and also possibly increasing query throughput.
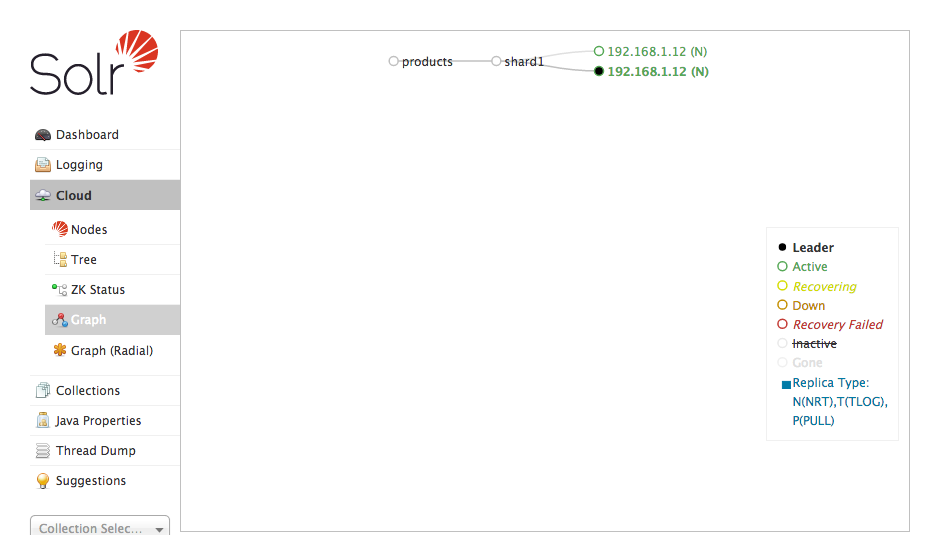
Verify
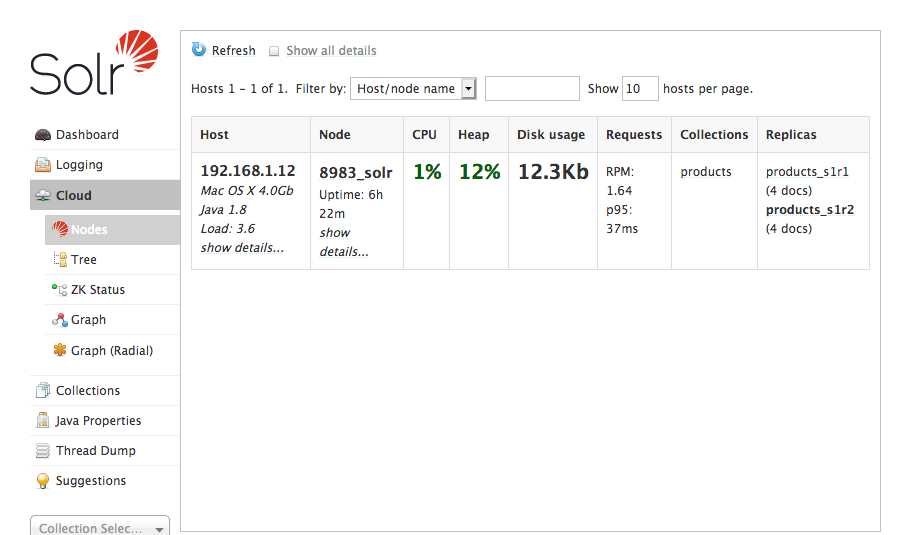
Open your browser to http://localhost:8983/solr and verify that the products collection has been created and that the replicas are present:
Import Data
We are going to import some of the sample data that comes packaged with Solr so we have something to play with and to verify data is being synchronized between nodes. The JSON format which Solr accepts is just an array of objects so if you have your own data feel free to use that.
cd solr-7.6.0
./bin/post -c products -h localhost -p 8983 example/exampledocs/books.json
| -c | specifies the collection to post data to |
| -h | specifies the SolrCloud host (default localhost) |
| -p | specifies the SolrCloud port (default 8983) |
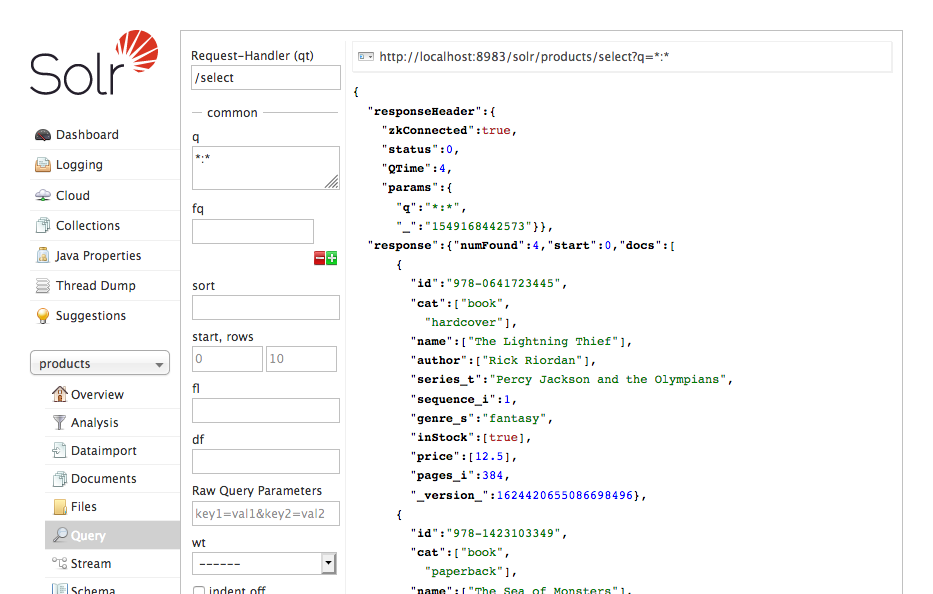
Query Data
Open your browser to http://localhost:8983/solr, select the “products” collection from the dropdown in the sidebar and click “Query”. Execute the query with the default values and verify that results are returned:
Autoscaling Config
SolrCloud can be configured to take actions when certain events are triggered. There are events when certain metrics are hit (CPU, disk usage, index size), when changes are made to the cluster (nodes added/removed), and a few others (see here). For this example we are going to be adding a trigger to add replicas of our collection when a new node is added.
Cluster Policy
First we need to set some rules that nodes within the cluster must meet:
curl -X POST "http://localhost:8983/solr/admin/autoscaling" --data-binary \
'{
  "set-cluster-policy": [
    { "replica": "2","shard": "#EACH", "node": "#ANY" }
  ]
}'
This configures the cluster to maintain 2 replicas of each shard on all nodes.
Node Added Trigger
Next we add a trigger for when a new node is added to the cluster:
curl -X POST "http://localhost:8983/solr/admin/autoscaling" --data-binary \
'{
  "set-trigger": {
    "name": "node_added_trigger",
    "event": "nodeAdded",
    "waitFor": "5s",
    "preferredOperation": "ADDREPLICA"
  }
}'
This trigger will listen for a nodeAdded event and upon 5 seconds of receiving it will begin replicating our existing collection(s) to the new node.
Let try adding a new node:
mkdir /tmp/solr
cd solr-7.6.0
./bin/solr start -c -p 8984 -s /tmp/solr -z 127.0.0.1:2181
| -c | specifies that Solr be started in SolrCloud mode |
| -p | specifies the SolrCloud port (default 8983) |
| -s | specifies the SolrCloud data directory |
| -z | specifies where our Zookeeper instance is running |
The /tmp/solr directory is just a temporary directory we are creating for this test.
Verify
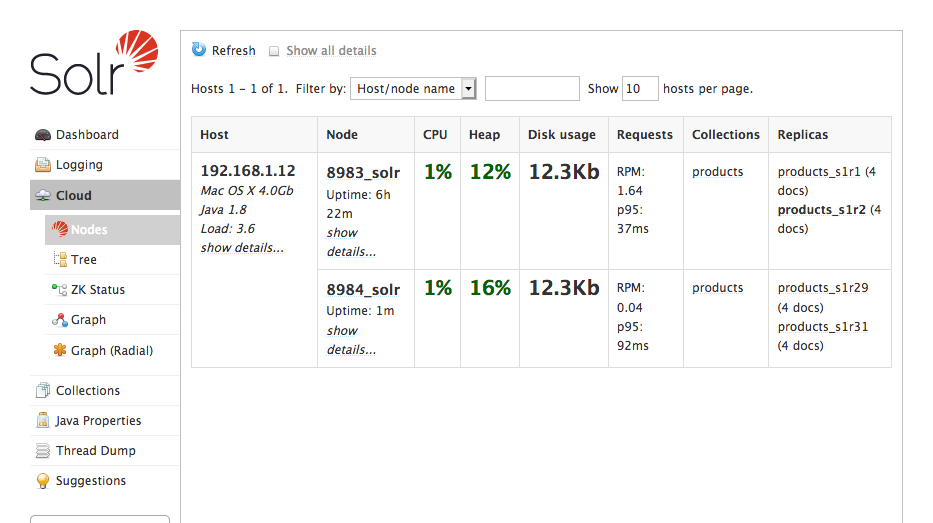
Open your browser to http://localhost:8983/solr and verify that the products collection has been replicated to the new node:
Node Lost Trigger
Now we want to add a trigger for when a node is removed from the cluster so that the cluster can be both scaled up and scaled down:
curl -X POST "http://localhost:8983/solr/admin/autoscaling" --data-binary \
'{
  "set-trigger": {
    "name": "node_lost_trigger",
    "event": "nodeLost",
    "waitFor": "120s",
    "preferredOperation": "DELETENODE"
  }
}'
This trigger will listen for a nodeLost event and upon 120 seconds of receiving it will delete the node from the cluster.
Let’s try stopping a running node:
cd solr-7.6.0
./bin/solr stop -p 8984
| -p | specifies the SolrCloud port (default 8983) |
Verify
Open your browser to http://localhost:8983/solr and verify that the node has been removed from the cluster. Remember that the trigger will not fire until 2 minutes after the node has been stopped.
Conclusion
Once you have autoscaling configured, this setup will allow you to add/remove nodes to your cluster on the fly with little to no configuration with data being synchronized seemlessly. Writes can be sent to any of the instances and the updates will be replicated across the whole cluster.