Using React Hooks to Connect to Redux
NOTE: This is a proof of concept and has not been optimized for production use.
Preface
While digging into the docs on React Hooks I came across the useContext hook and was curious if this could be used in place of React Redux’s connect method. The following is an experiment of bypassing React Redux altogether and instead using useContext to connect components to the Redux store.
Setup
Create a new React app:
npx create-react-app my-app --use-npm
Install Redux:
cd my-app
npm install --save redux
Create a Redux Store
Modify your index.js file to create a Redux store to be used with the app and a reducer that will process action updates:
import React from 'react';
import ReactDOM from 'react-dom';
import { createStore, combineReducers } from 'redux';
import './index.css';
import App from './App';

const items = (state = [], action) => {
  switch(action.type) {
    case 'ADD_ITEM':
      return [...state, action.payload];
    default:
      return state;
  }
};
const rootReducer = combineReducers({ items });
const store = createStore(rootReducer);

ReactDOM.render(<App />, document.getElementById('root'));
Our store will have a single key items which defaults to an empty array and items can be added by triggering an ADD_ITEM action with the item object as the payload.
Create a Context
This is normally where React Redux would come in and you would add a <Provider> wrapper component around the <App> passing the store as a prop. We are going to implement this manually so the first thing we need to do is create a Context.
Create a new Context.js file in your src directory with the following:
import React from 'react';

const Context = React.createContext(null);
export default Context;
We are using the createContext method to create a new Context with a default value of null. According to the React docs “Context is designed to share data that can be considered “global” for a tree of React components”.
React Redux is using this behind the scenes with the <Provider> component included in the library.
Subscribe to the Redux Store
Next we are going to create a new Root component that will take the Redux store as a prop. This component will be in charge of setting up the Context provider component as well as triggering state changes when the store is updated.
Create a new Root.js file with the following:
import React, { useState, useEffect } from 'react';
import Context from './Context';
import App from './App';


const Root = ({ store }) => {
  const [state, setState] = useState(store.getState());
  useEffect(() => {
    return store.subscribe(() => setState(store.getState()));
  }, [store]);
  return (
    <Context.Provider value={{ state, dispatch: store.dispatch }}>
      <App />
    </Context.Provider>
  );
};

export default Root;
The Root component takes in the Redux store as a prop and maps the current state of the store to the component’s local state using the useState hook. The useState hook allows maintaining state in functional components. See here for details.
Next we make use of the useEffect hook to add a change listener to the Redux store that will update the Root component’s state with the current state of the store. By default effects run each time the component renders, however you can pass in an optional second argument as an array of values where if none of these values change the effect will not run. In our case we passed the store prop causing the effect to only run on initial mount. See here for details on useEffect.
Finally we import our Context object and wrap our app in the <Context.Provider> component passing in a value of the store’s current state as well as a reference to the store’s dispatch method.
The <Context.Provider> component broadcasts its value down the tree making it available to any child components who need it.
Connect the Root Component
Next we need to update our index.js file to render the <Root> component instead of <App>, passing in the Redux store as a prop.
import React from 'react';
import ReactDOM from 'react-dom';
import { createStore, combineReducers } from 'redux';
import './index.css';
import Root from './Root';

const items = (state = [], action) => {
  switch(action.type) {
    case 'ADD_ITEM':
      return [...state, action.payload];
    default:
      return state;
  }
};
const rootReducer = combineReducers({ items });
const store = createStore(rootReducer);

ReactDOM.render(<Root store={store} />, document.getElementById('root'));
Connect a Child Component
Now that the <Context.Provider> component is setup making the Redux store’s current state and dispatch method available, we can now use the useContext hook to access these from child components. Let’s create a new ItemList component to test this out.
Create a new ItemList.js file with the following:
import React, { useState, useContext } from 'react';
import Context from './Context';

let itemId = 0;

const ItemList = () => {
  const [value, setValue] = useState('');
  const { state, dispatch } = useContext(Context);
  const { items } = state;
  const onKeyDown = (e) => {
    if (e.key === 'Enter') {
      itemId += 1;
      dispatch({
        type: 'ADD_ITEM',
        payload: { id: itemId, text: value }
      });
      setValue('');
    }
  };
  return (
    <div style={{ textAlign: 'left' }}>
      <h1>Item List</h1>
      <input
        type="text"
        value={value}
        onChange={e => setValue(e.currentTarget.value)}
        onKeyDown={onKeyDown}
        placeholder="Add Item..."
      />
      <ul>
        {items.map(({ id, text }) => (<li key={id}>{text}</li>))}
      </ul>
    </div>
  );
};

export default ItemList;
Let’s walk through what is going on here:
const [value, setValue] = useState('');
First we are setting up a local state variable to sync the current value of the input box. As the input changes, setValue is called with the latest value.
const { state, dispatch } = useContext(Context);
Next we use the useContext hook passing in the Context object we setup in our Context.js file. The return value of the useContext is the current value of the <Context.Provider>. If you recall we are setting this in our Root component to an object with state and dispatch keys referencing the current state of the store and the store’s dispatch method. We are destructuring these two values into local variables.
const { items } = state;
When we setup our reducers we structured our state to have an items key which defaulted to an empty array. We are now destructuring this value into a local variable called items.
const onKeyDown = (e) => {
  if (e.key === 'Enter') {
    itemId += 1;
    dispatch({
      type: 'ADD_ITEM',
      payload: { id: itemId, text: value }
    });
    setValue('');
  }
};
Here we are creating a callback function to listen for when the Enter key is pressed within the input box. When the Enter key is pressed we use the dispatch method imported from the Context to dispatch an action to the store to add a new item and then afterwards clear the input. The itemId variable is just a global counter to provide a unique id for each item added.
return (
  <div style={{ textAlign: 'left' }}>
    <h1>Item List</h1>
    <input
      type="text"
      value={value}
      onChange={e => setValue(e.currentTarget.value)}
      onKeyDown={onKeyDown}
      placeholder="Add Item..."
    />
    <ul>
      {items.map(({ id, text }) => (<li key={id}>{text}</li>))}
    </ul>
  </div>
);
Finally we return some JSX and hook up all our events for the input. We have a header with text “Item List”, an input box to add new items and then a list which renders out each item within the items array retrieved from the state.
Putting It All Together
The last piece we need to get this working is to render the <ItemList> from within the App component.
Update the App.js file with the following:
import React from 'react';
import ItemList from './ItemList';
import './App.css';

const App = () => (
  <div className="App">
    <header className="App-header">
      <ItemList />
    </header>
  </div>
);

export default App;
There is nothing special here, we are just rendering the <ItemList> component within some default tags that come with create-react-app to give us some style.
If your app is not currently running, start it with the following command:
npm start
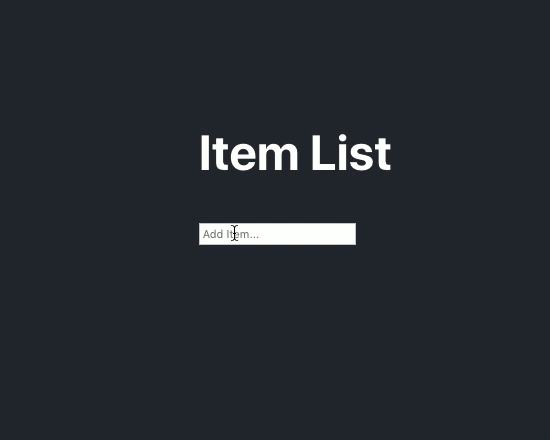
You should be presented with the Item List and an input box allowing you to add items:
Conclusion
It works! This way of accessing the Redux store is extremely clean and intuitive compared to the connect method provided by React Redux and could become even more so with the use of Custom Hooks. However there seem to be some performance issues that need to be sorted out before this approach becomes the norm (see here).